6 min read
Product Update Highlights: Oracle EPM Integration Agent
This blog is a guide for using Oracle EPM Integration Agent for inbound as well as outbound integration with Oracle EPM Cloud.
EPM Integration Agent Background
We can directly extract, load, and transform metadata and data from a wide variety of on-premises and third-party cloud source systems for use in Oracle EPM Cloud. The agent, implemented as a data source for Data Management and Data Integration, responds and provides the specified information when a user executes data load rules.
The EPM Integration Agent provides connectivity between the EPM Cloud and on-premises sources including SQL data sources like –
- Oracle and Microsoft SQL Server
- E-Business Suite GL
- PeopleSoft GL
The agent can run in two different modes:-
- Asynchronous
- Synchronous
The mode determines how communication is opened between your on-premises data source and the EPM Cloud.
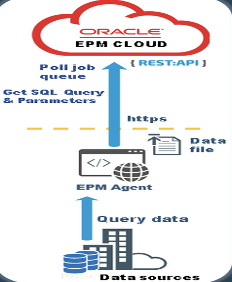
Asynchronous Mode:
When integration is executed in asynchronous mode, the EPM Cloud queues for the integration job to execute. The agent polls at intervals and executes the jobs queued.
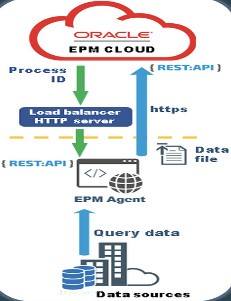
Synchronous Mode:
In synchronous mode, EPM Cloud directly calls the agent. This requires EPM Cloud to connect over HTTP(s) to the agent.
EPM Integration Agent Configuration:
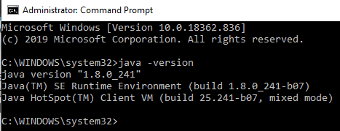
The agent requires a Java Runtime Environment (JRE) 8+ to run. JRE 1.8 update 221 needs to be downloaded and installed.
Type in search CMD>> Type java -version
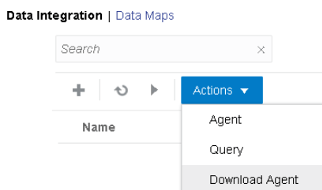
Login to PBCS > Navigate > Data Exchange and go to Action > Download Agent.
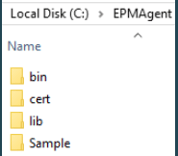
Once downloaded, extract the zip file.

Type command prompt in search > Run as administrator.
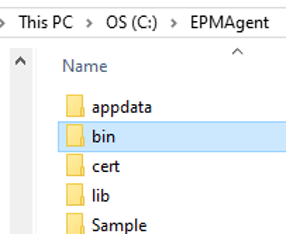
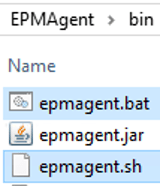
In the “bin” directory folder the following is the .bat file, which is used for configuring and running the EPM Agent.
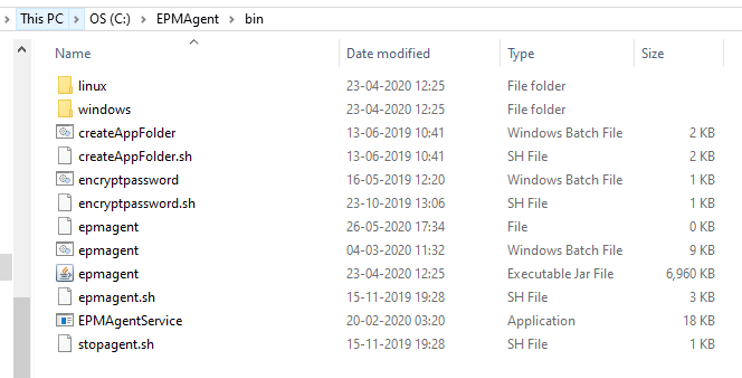
createAppFolder.bat – Use for the creation of an app folder where one registers the application to connect to Source on-premise to the Target application.
encryptpassword.bat – Use for encrypting password use for connection with PBCS/EPBCS URL.
epmagent.bat – Use for running EPM Agent.
stopagent.bat – Use for stopping EPM Agent.
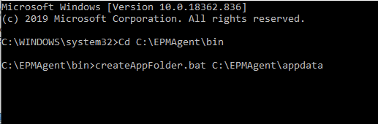
Next is to open Command Prompt and traverse to the bin directory.

Type createAppfolder.bat and press ENTER.
It will create below four folders (config, data, logs, scripts).
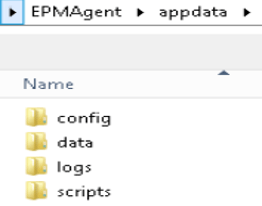
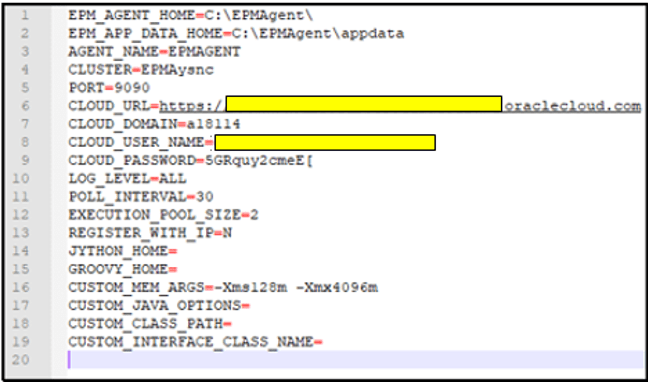
config Folder contains an initialization file agentparams.ini where the parameters to connect to PBCS/EPBCS are set up. So traverse to the config folder and open the agentparams.ini file.
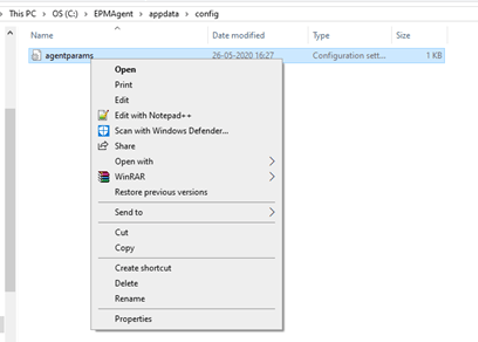
The file will be open in the below format – Which we will open and populate along with steps.

EPM_AGENT_HOME: Path where the EPM Agent folder is located
EPM_APP_DATA_HOME: Path where Application is created i.e. appdata
AGENT_NAME: It’s the parameter name that appears in Data Exchange when connected (Explain in the further process), any name can be used
CLUSTER: It is the Cluster name that is created in the Data Exchange in PBCS/EPBCS application
PORT: always 9090
CLOUD_URL: URL of PBCS/EPBCS (this should be till oracle.com)
CLOUD_DOMAIN: Domain of your cloud application
CLOUD_USER_NAME: Username
CLOUD_PASSWORD: Encrypted password which is covered in further process
POLL_INTERVAL: It is in seconds and only used for Asynchronous Mode
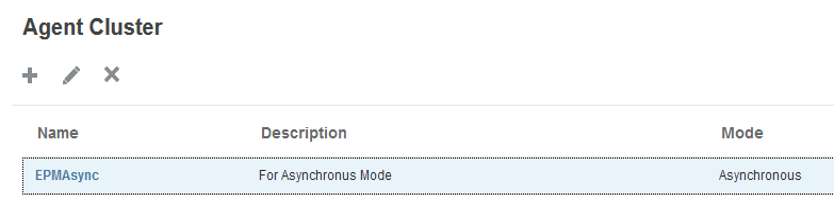
For setting up parameters one has to create clusters in PBCS/EPBCS, clusters provide a way of organizing integrations. Clusters are created in Data Management and can either be defined to operate in synchronous or asynchronous modes.
To create a cluster, go to Data Exchange > Action > Agent > Create New
We need to encrypt the password with “encryptpassword” script in the agent bin directory.
Go to the “bin” folder.
Open Command prompt type encryptpassword.bat > type password and press enter.
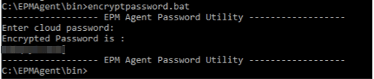
The encrypted password must be manually copied to the ini file.
** Example of a completed ini file**
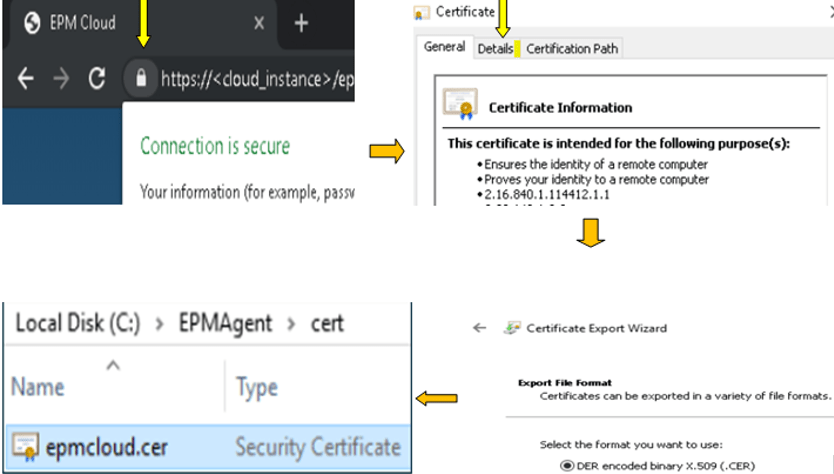
The EPM Cloud SSL certificate needs to be exported and copied to the agent cert folder.
- Click the padlock icon
- Select Site Settings
- Certificate
- Details tab and select Copy to File
- Save the file to the agent “cert folder”
The agent is now ready to run in asynchronous mode.
Open the command prompt and traverse to the EPM Agent bin folder.

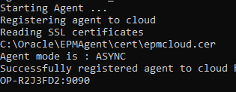
Go back to the Data Integration and select the cluster. You will now see the agent has been registered successfully.
![]()
Loading Data using EPM Integration Agent:
Before we begin the data load, we need to test the connection with the source database.
Open SQL Developer and connect with the Database.

We want to connect to Employee Details View.

Create an SQL query in Data Integration that will be executed by the agent to extract the data.
Go to Data Integration > Actions > Query.
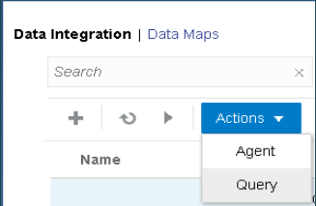
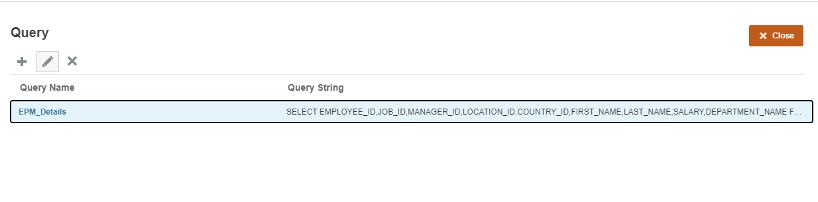
- Add a new query
- Enter a new name for the query and the SQL statement and save
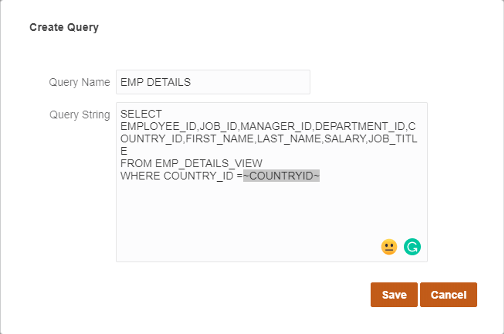
We have ~COUNTRYID~ in the SQL statement. This allows you to filter the data to be extracted. It is possible to set the value either at the data load rule level or at the application level.
The next step is to create a comma-separated file with a line containing all the possible columns that one needs to load the data in the Application.

*Note* – The name of the file will become the name of the target application in Data Management and save the file in-app data.
Data Management

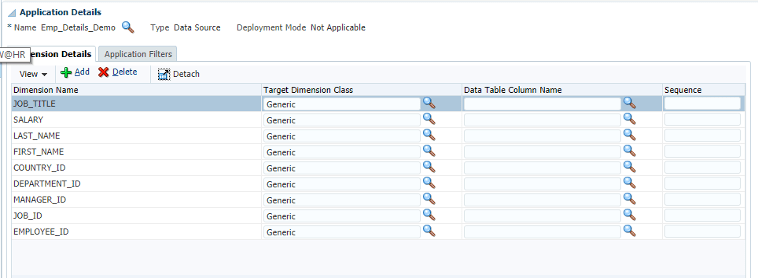
Now it’s time to create a Data Source.
Go to Data Management.
Target Application > Add > Data Source.

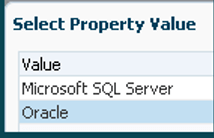
Select Premise Database OR Cloud.

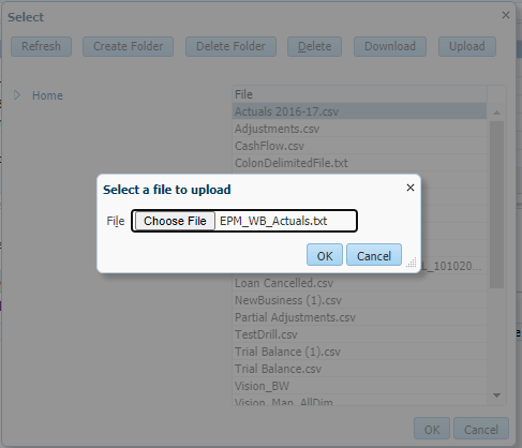
Upload the file with the column names and select it and click Save.
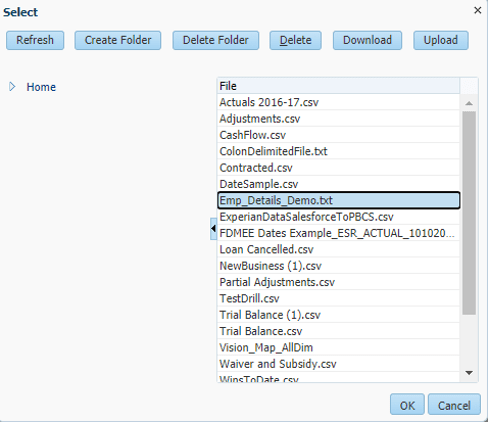
The filename has been converted into the application name.
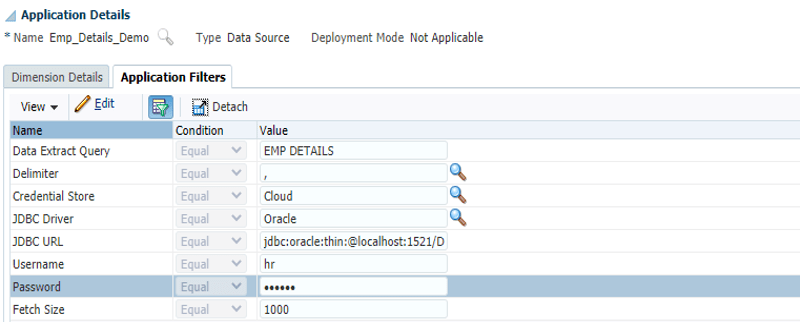
Go to the Application filter tab that provides options to configure the connection to the source database.
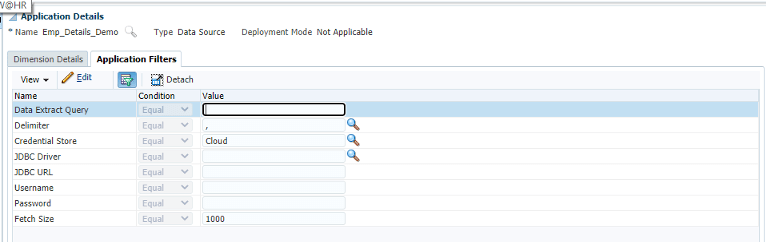
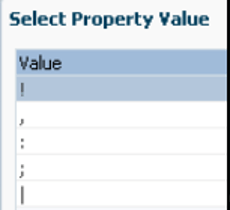
Choose Delimiter.
Choose Credential Store – Cloud or File.
JDBC driver.
jdbc:oracle:thin:@dbhost:port/service
For this case, we are using jdbc:oracle:thin:@localhost:1521/DEV
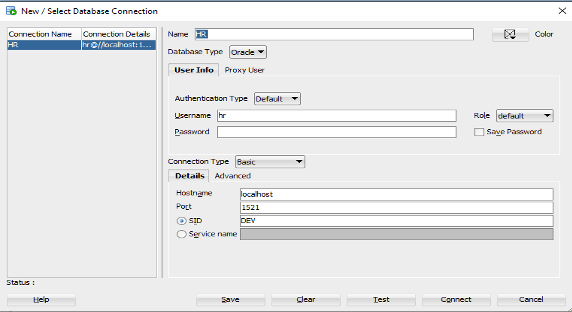
Username/Password is for the user you want to connect to the database.
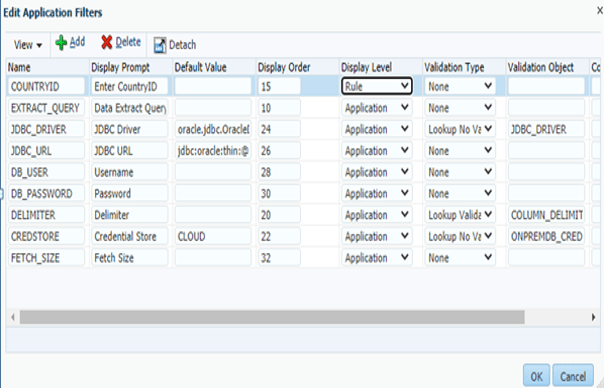
Click Edit to add Variable that is used in the SQL query “COUNTRYID”.

Note: The Name Country ID should be an exact match with what has been mentioned in the SQL Query.
Give Filter Name, Display Prompt, Display order, and Display level, and click OK.
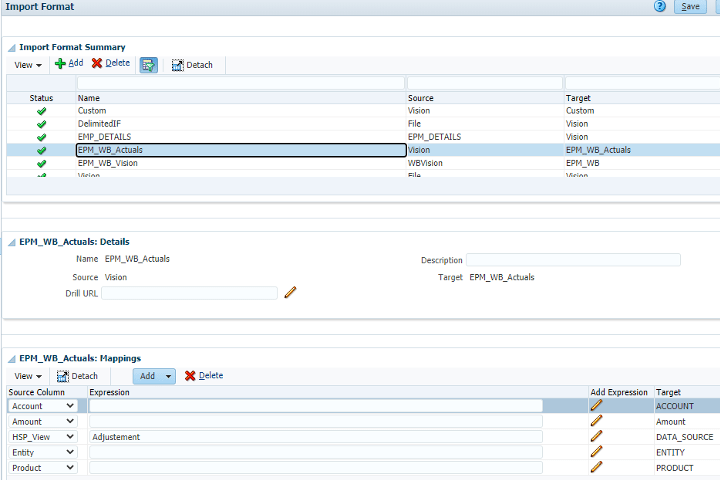
Create Import Format in Data Management.
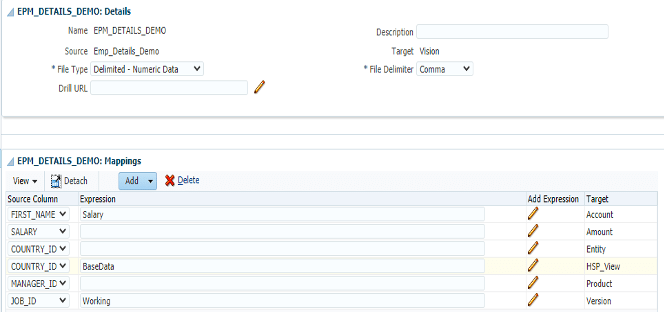
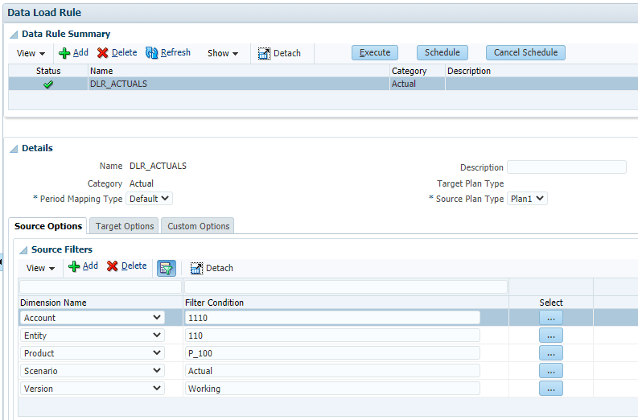
Follow the normal integration procedure for creating the Location and Data Load Rule. In the Data Load Rule, one can see the filter for Country ID. Enter the filter as desired.
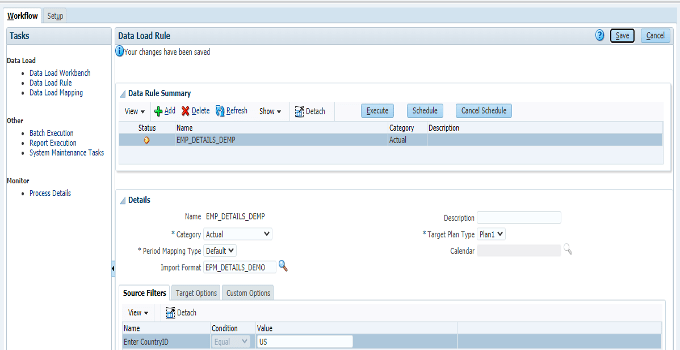
Click Save, and click Execute.
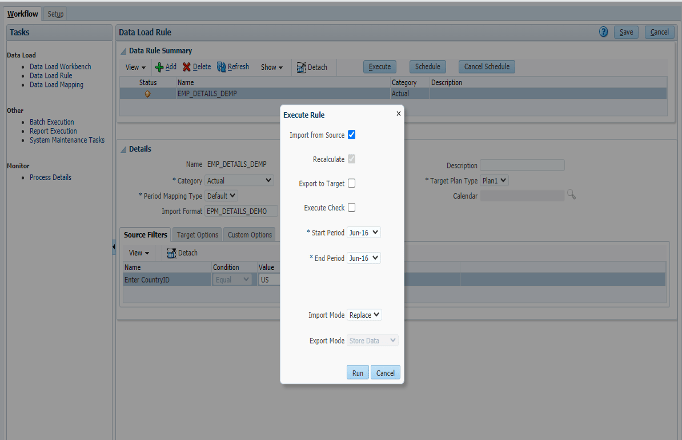
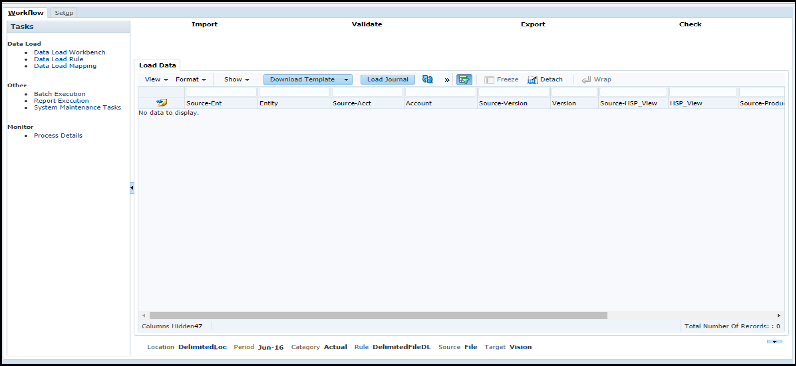
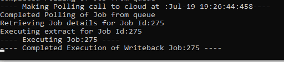
After the execution of the rule, we can see the file is processing in the Process details and also in the command Prompt “Polling”.


Once the process is completed, Data Load Workbench to see the loaded data.
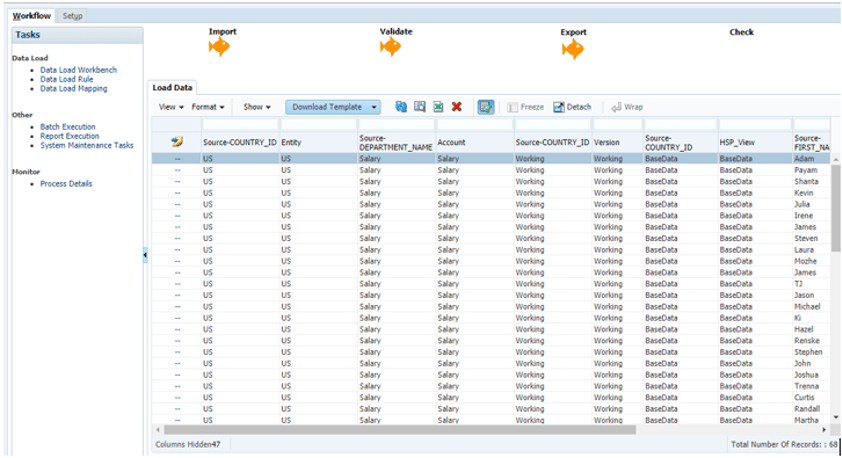
We can check the .dat file in EPM Agent under
C:OracleEPMAgentappdata[application-name]data
Data Write Back using EPM Integration Agent:
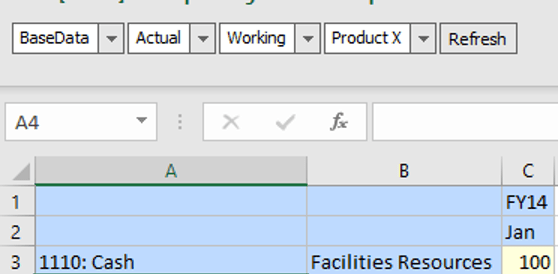
Consider the “ACTUALS” database as the target where the adjusted data is to be written back.
The table structure is as below.

Currently, data is loaded for Cash, and hence the Data Source: Load.
![]()
The following adjustment data needs to be written from an Oracle EPM Cloud Application back into the ACTUALS database.
The first step is to register the On-premises Database in Data Management.
Create a file with Headers of the Target Database i.e. ACTUALS.
Note: Mentioned the exact columns which are present in the Database.
EPM WB Actuals
![]()
Registering the Database in the Data Management.
For that traverse to Data Management in the EPM Application by clicking Navigator->Data Management->Setup-> Target Application.
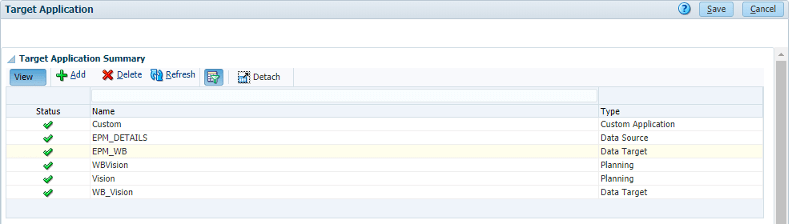
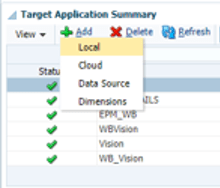
Select Add and click on Local.
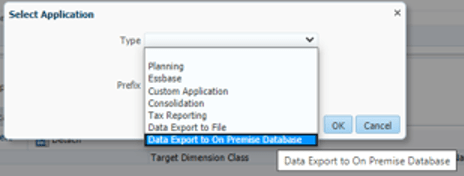
Select Type as “Data Source to On-Premise Database” and upload the file created in the step above.
Select the uploaded file, click save and change the Amount Target Dimension Class to “Amount” and clear the Data Table Column Name
Repeat the step for the Period, Year, and Scenario dimension.

Mention the credentials and Table Name in the Application Options tab as shown below.
Note: Workflow mode should be set to “Full”.
Table Name Actuals.

Now follow the normal process for creating Location and Import format.
Import format.
Location.

Create a Data Load Rule with needed filters.
Execute the Data Load rule.
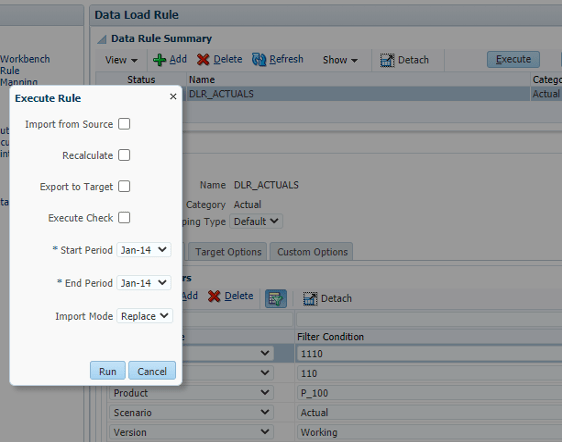
Check the progress via the Process Details and Command Prompt.
One can check the .dat file in EPM Agent under C:OracleEPMAgentappdata[application-name]data and validate whether the data is pushed to the “ACTUALS” Database.

-

Manufacturing
Diversey moves to Oracle EPM Cloud -

Transport and Mobility
Maximising Innovation and Reducing Costs for Angel Trains -

Manufacturing
Baxters Streamlines Growth and Reduces Costs with Oracle