7 min read
Working with Data Catalog in Oracle Data Lakehouse
Oracle Cloud Infrastructure (OCI) Data Catalog is part of the Oracle Data Lakehouse platform and is defined as “a fully managed, self-service, data discovery and governance solution for your enterprise data. With Data Catalog, you get a single collaborative environment to manage technical, business, and operational metadata.”
I am sure many users will find the Data Catalog very useful. It provides several really nice features which enable users to:
- Harvest metadata from various data sources.
- Create a common, enterprise-wide business glossary.
- Link data to business terms and tags.
- Explore data assets in Data Catalog.
- Automate harvesting jobs to update the catalog on a regular basis.
- Integrate with other applications using REST APIs and SDK.
So where do we start?
At the start, of course. We need to locate the Data Catalog Service in OCI.
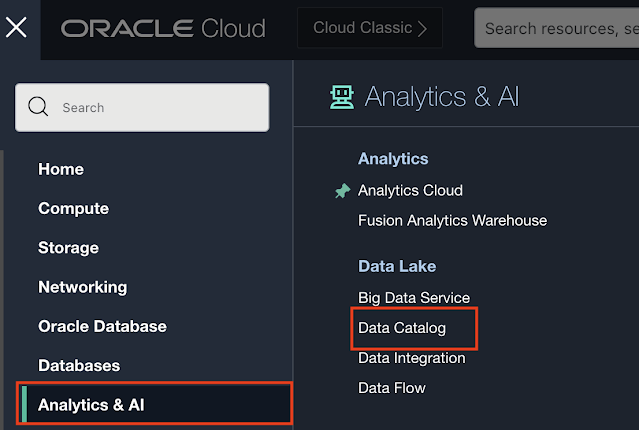
It is located under the Analytics & AI menu item in the OCI navigation panel and then you can find Data Catalog under Data Lake:
The Data Catalog Overview page opens. As explained above, the three key capabilities are Harvest, Enrich, and Search. Before we take a closer look at the three, let’s just take a look at how to create one in the first place.
Creating a new data catalog
If you navigate to the Data Catalogs menu item of the Data Catalog navigation panel on the left, you will open a page with an option to create a new Data Catalog.

Creating a new data catalog is rather straightforward. What is required is the compartment in which the data catalog is created and the data catalog’s name.
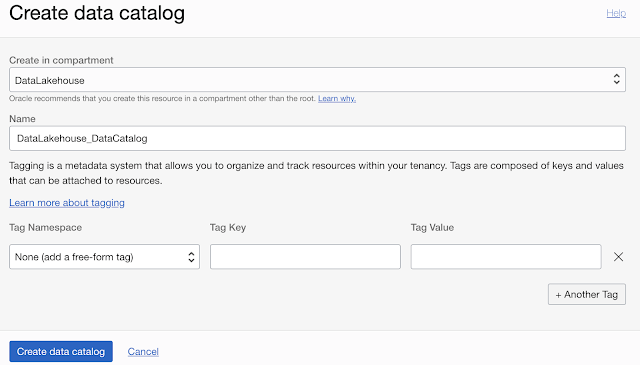
Any additional tags can be added.
After the catalog has been created users can start harvesting data.
Remark: Please note that the maximum number of data catalogs per tenancy is set to 2 by default.
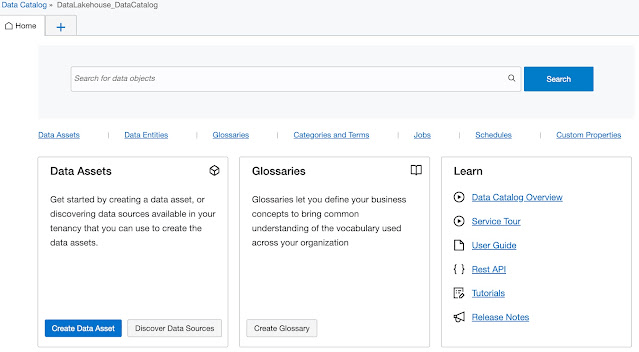
Discover Data Sources
In the first case, data assets need to be created by providing detailed information on how to connect to that specific asset. The second option removes this step as it is a kind of wizard guiding the user to create a new data asset. Let’s take a look at this second option.
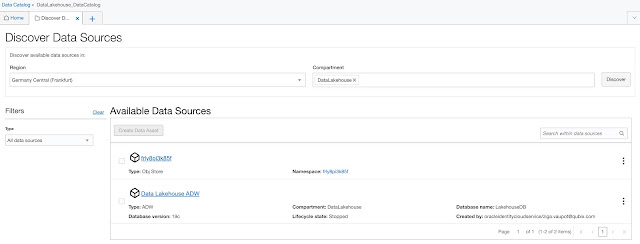
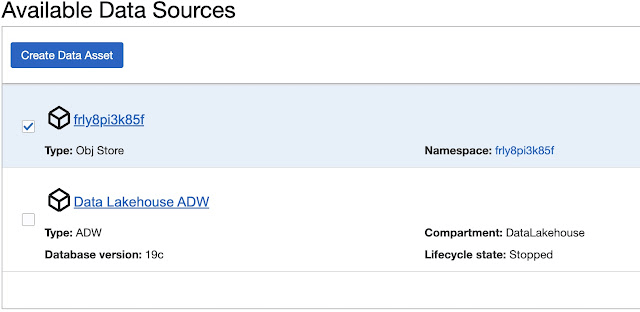
When Region and Compartment are selected, clicking on the Discover button, the list of available resources appears in the list. In our case, we can see one Object Storage and one Autonomous Database have been found.
To create a Data Asset from the discovered data source, for example, Object Store, select one from the list (only one can be created at a time) and click Create Data Asset.
Create Data Asset window opens populated with details of the data asset you are creating.
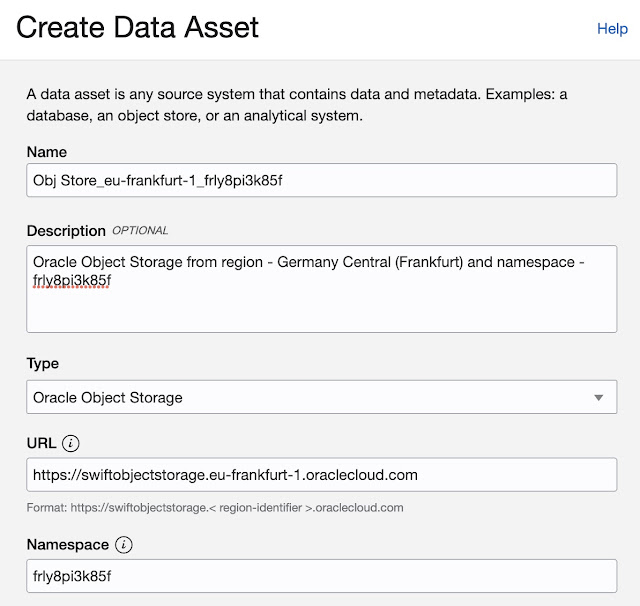
Add Connection
At this point, Data Asset has been created, however, we haven’t defined how to connect to this specific asset. So the next step is to add a new connection (remember we are creating Data Catalog from scratch).

Add Connection form opens:
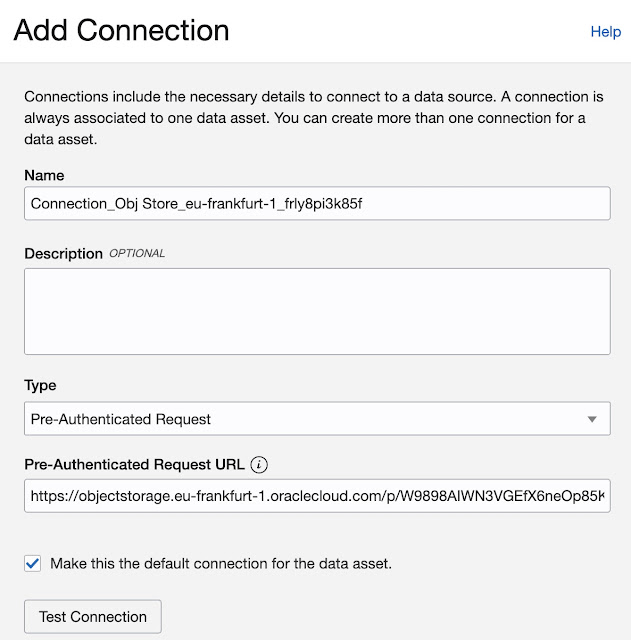
For Type, the following options are available: Resource Principal, Pre-Authenticated Request, and S2S Principal. In my case, I will choose a Pre-Authenticated Request (PAR). For this PAR URL is required.
If everything is properly set, Test Connection will return a “Connection Successfully Validated” message.
And now, we are ready for some Data Harvesting.
Data Harvesting
It all starts simply by clicking on the Harvest button.
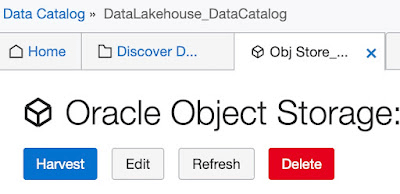
This takes you to the 3-step wizard which results in a job that will execute the “harvesting”.
In the first step, a connection is selected:
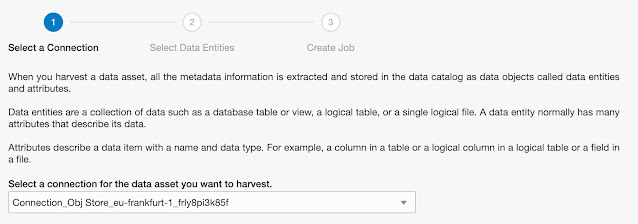
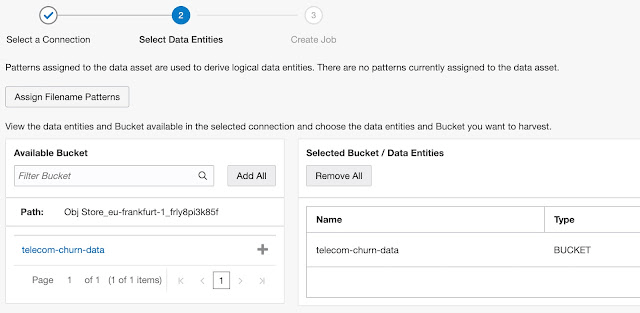
In the second step, buckets are selected to be included in the job. In our example, with specified PAR, only one bucket is available.
Simply find a bucket and move it from the Available Bucket list to the Selected Bucket / Data Entities list.
The last, third, step is to define the job itself (incremental harvest, including unrecognised files) when the job runs, etc.
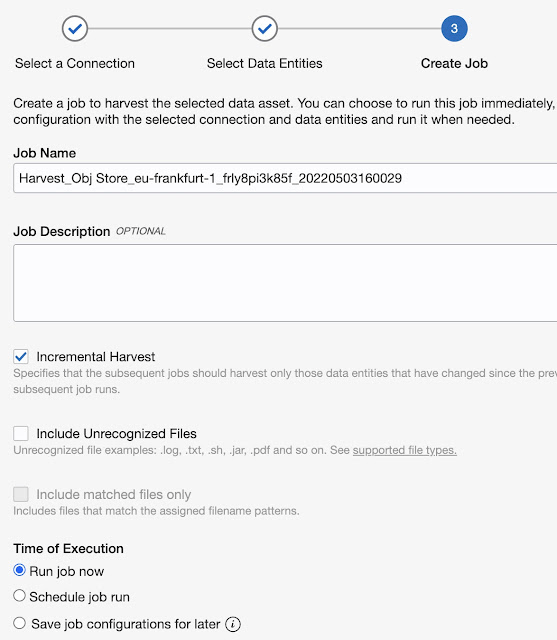
Now, let’s select Create Job and wait for it to complete.

Browse Data Assets
Once the job is completed, data assets are available for review. On the home page, some basic information about data stored in the data catalog is already (truly not much) available.
You can browse catalog data from top to bottom or you can use search to navigate directly to the item you are interested in.
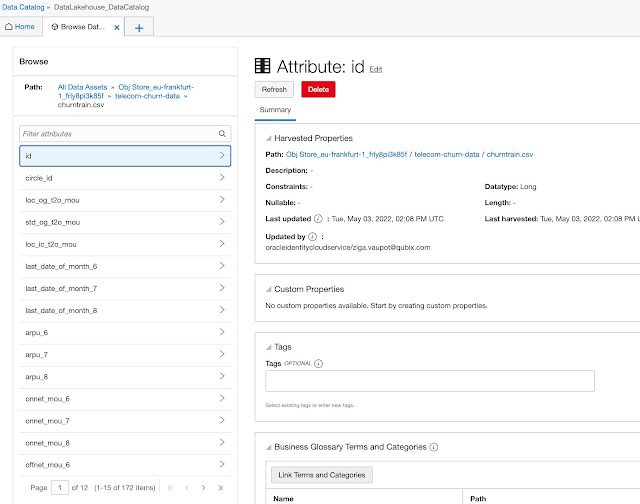
The lowest granularity, in the case of structured data attributes, but any other level of granularity is captured in the same way. This is valid for all data sources, for example, database tables, etc.
In the screenshot above, there are several fields such as Customer Properties, Tags, and Business Glossary Terms and Categories. The next chapter focuses on these.
- Customer Properties,
- Tags and
- Business Glossary Terms and Categories.
All three categories of metadata can be created by the end-user based on their business or other requirements and needs.
Customer Properties
During the data harvesting job, usually, there are already some technical properties created, such as data entity type, create date, last update date, etc.
Very often these technical properties are not enough to emphasize the business context of catalog objects, therefore Custom Properties can be defined and metadata about that business context can be captured. For example, the Data Owner.
Data Catalog users can simply define and create Custom Properties and use them with any catalog objects.
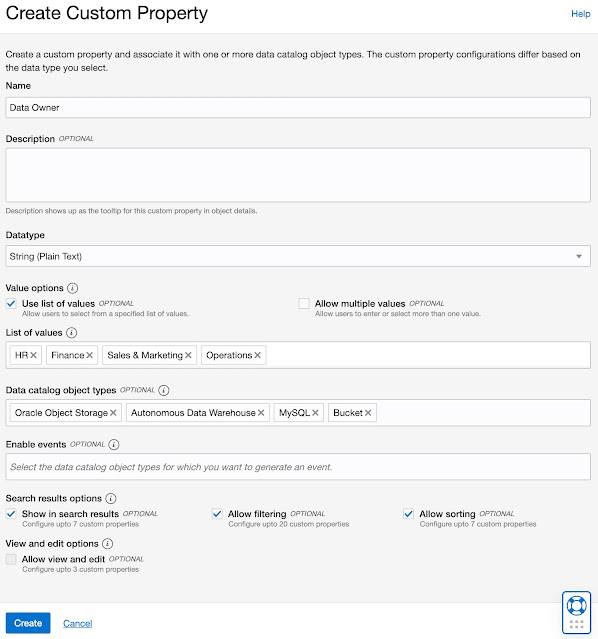
As you can see, for each Customer Property, additional metadata, such as List of Values, or for which Data Catalog Object Types this particular Custom Property is valid, can be defined.
We can also define Search options which we will explore a bit later.
Once Custom Properties are defined, these can be assigned to catalog objects, depending on the Data catalog object type for which the property was enabled.
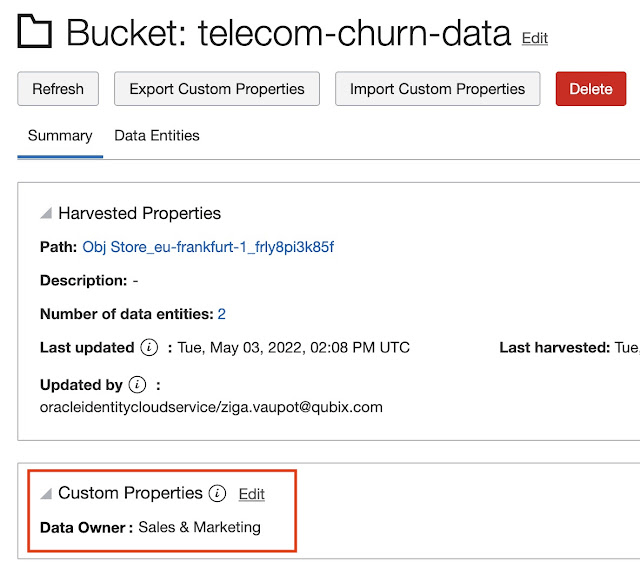
In the example above, the data owner for the bucket telecom-churn-data is Sales & Marketing. Observe Bucket has been added to the list Data catalog object type for Custom Property Data Owner.
Tags
Tags are free-form annotations that capture any additional knowledge or information about the catalog object in question.

Data catalog objects annotated by Tags are searchable.
Business Glossary Terms and Categories
The last metadata is probably the most powerful. By creating a business glossary and assigning business terms and categories to table attributes or any other catalog objects, users can add strong business context to data in the data catalog.
Usually, the business glossary is organised in hierarchies: Category – Subcategory – Term.
Create Glossary
This is the first step we need to undertake to start working with business glossaries.
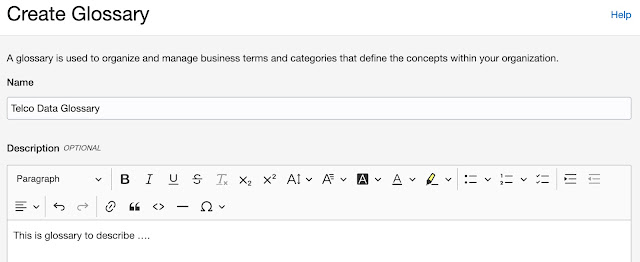
At this point, only the Glossary name and description are needed.
We continue with Create Category
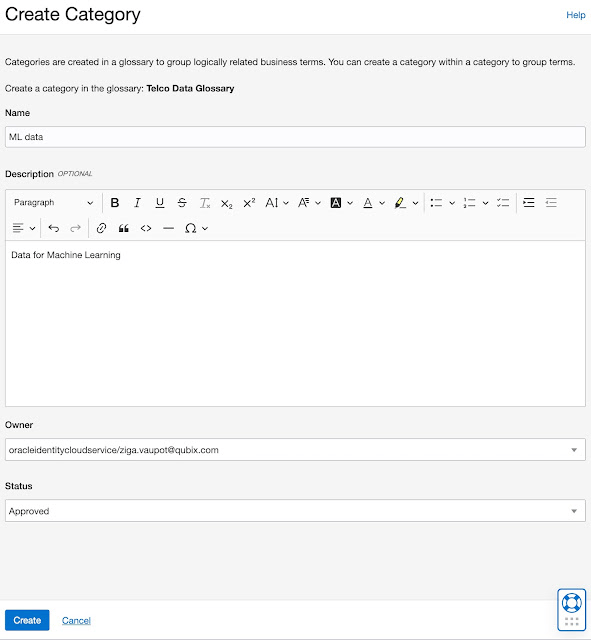
And we can continue with building the hierarchy of categories and terms (at the lowest granularity level):
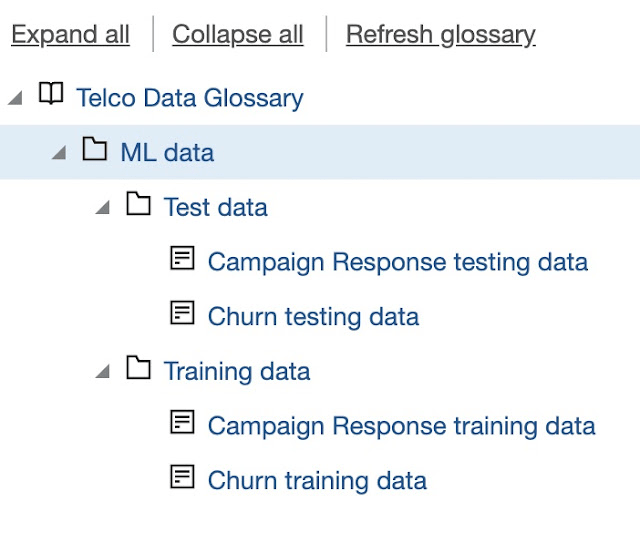
Once the Glossary is prepared, categories and terms can be linked to data. For example, on the bucket level, we can assign the following Categories (more than one Category can be assigned to a particular catalog object):
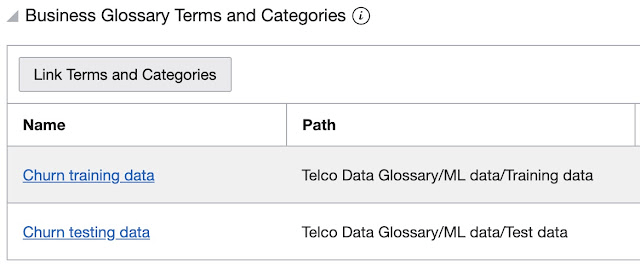
Or, for example, assigning a single category to the train data only.
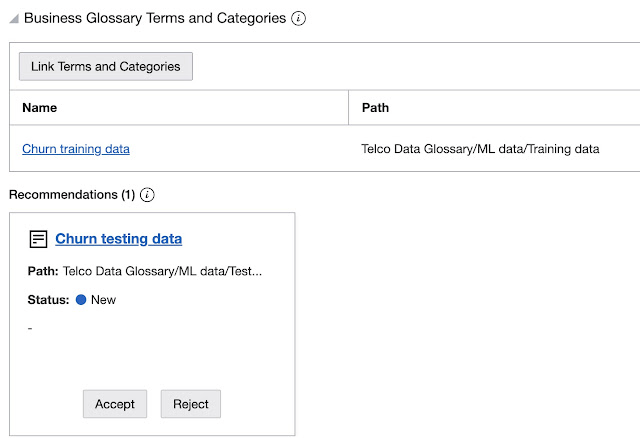
As you can see, there is one additional recommendation left, which can be either accepted or rejected.
Search
Users have three options to find the information contained in the Data Catalog: Search, Browse, and Explore.

Search is basically limited to search lines, just like with Google or similar search engines. Simply type the search term in that search line and click Search.
For example: type “churn” and clicking Search gives the following results:
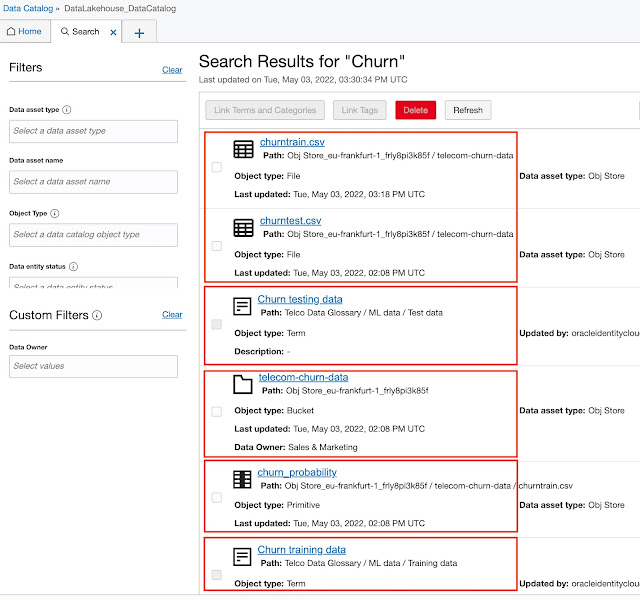
The first two hits are simply two CSV files with “churn” in their names. The 3rd and 6th hits are two Terms we created. The 4th hit in the list from the top is a bucket containing “churn” in its name, and the 5th is a column in churntrain.csv file.
The bottom line is, that search is searching through all catalog objects and returns results. We can additionally limit the results by setting Filters in the left sidebar.
We saw an example of Browsing Data Assets in the Harvest section, so I won’t repeat myself here.
Exploring the data catalog can be done by clicking on the links below the search line:

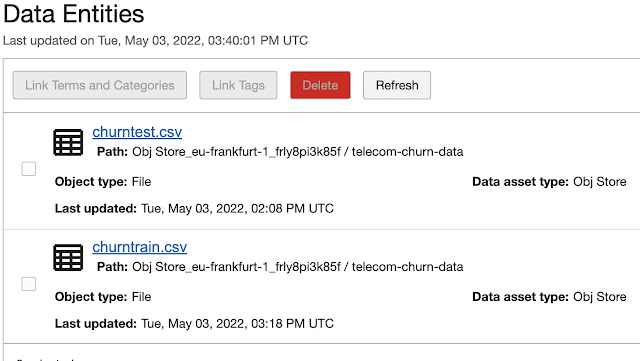
Clicking on one of the “explore categories”, for example, Data Entities, we can drill down and explore in more detail selected objects.
Conclusion
The Data Catalog seems to be quite a powerful, easy to use, tool to gather all the data from available data sources (it is not limited to OCI data sources only but can connect to on-premises data sources as well), enrich that data, and put it in some meaningful business context.
Personally, I would be interested to see the Oracle Analytics repository listed among available data sources, but currently, it is not. Also, I would like to use this tool to present data lineage, so we could track data through the whole platform as it was changing and transforming to be finally presented in an application or analysis.
But, already by now, the tool is capable of harvesting a good deal of all available enterprise data. So if you are looking for such a tool, it is worth checking it with Oracle too.